
In today’s rapidly evolving threat landscape, it is essential for organizations to regularly assess their attack surface to identify potential vulnerabilities and weaknesses. This can help you better understand your organization’s security posture and take proactive measures to protect its critical assets.
In this article, we will explore how to use Maltego for attack surface assessments while relying solely on free data sources and provide a practical guide to help you get started.
Maltego for Attack Surface Assessments: A Blog Series 🔗︎
What is an Attack Surface Assessment? 🔗︎
An attack surface assessment involves identifying the various entry points an attacker could use to gain unauthorized access to an organization’s network or systems. These entry points can include everything from publicly available websites and social media profiles to network devices and cloud-based services.
An organization can proactively mitigate any vulnerabilities and prevent unauthorized access by identifying all potential entry points with the proper measures in place and an adequate tool stack.
Using Maltego for Attack Surface Assessments 🔗︎
Maltego is used extensively by security and threat intelligence teams worldwide for a wide range of cybersecurity tasks, including conducting attack surface assessments.
In this guide, we will demonstrate how to do that by using Maltego and following the steps below:
- Step 1: Define the Scope of the Assessment
- Step 2: Identify Potential Data Sources
- Step 3: Reconnaissance
- Step 4: Analyze the Information
- Step 5: Develop a Remediation Plan
Let us delve into each of them.
Step 1: Define the Scope of the Assessment 🔗︎
The first step in any attack surface assessment is to define its scope. This includes identifying the target systems or network and determining the objectives. For example, our aim might be to identify all publicly accessible domains and IP addresses associated with your organization.
In this demo, we’ll explore the on-premises infrastructure of a large international organization. We will look to identify any potential security vulnerabilities, including insecure open ports, legacy systems, exposed security solutions, and critical vulnerabilities such as unpatched software.
Step 2: Identify Potential Data Sources 🔗︎
Once you have defined the scope of the assessment, the next step is to identify potential data sources that can be used to gather information about the target.
To configure Maltego for attack surface assessments, we will need to select the appropriate, relevant data sources using the Filters available on the Start Page of your Maltego Client.
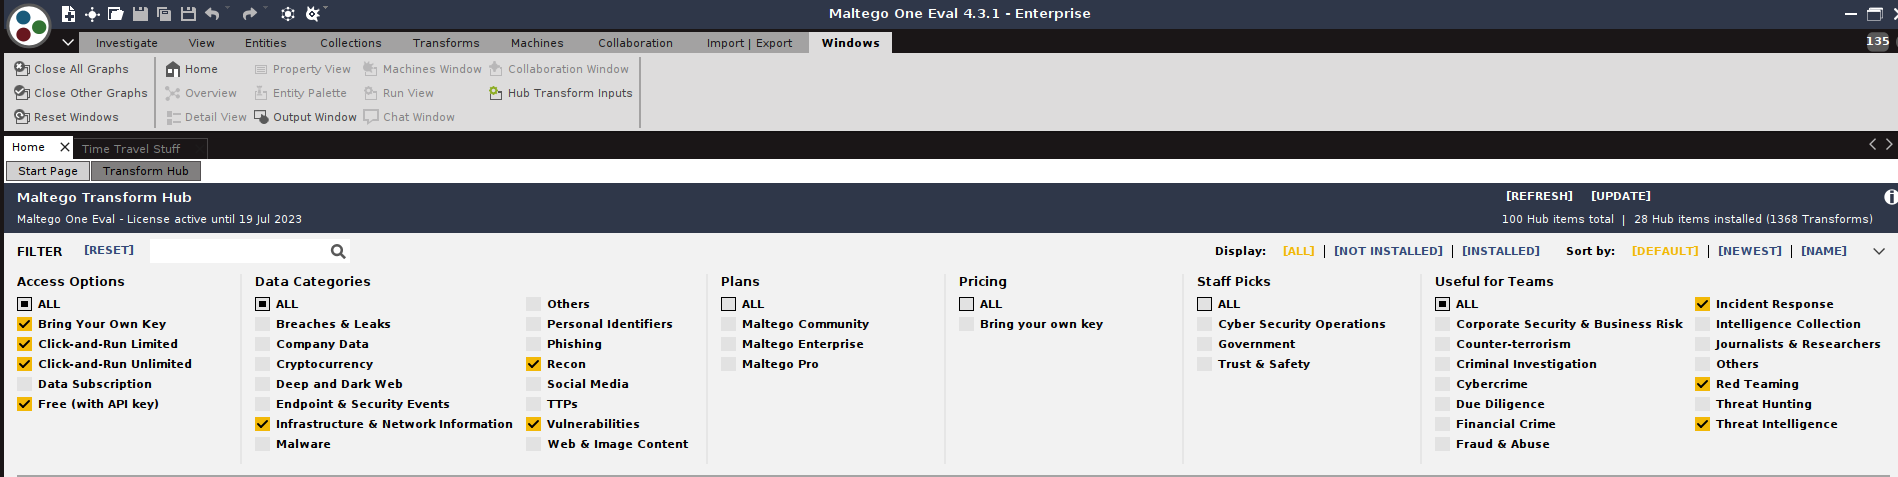
In our demo assessment, we will use free data sources only:
Step 3: Reconnaissance 🔗︎
Once you have installed all relevant Transforms, you can start gathering information about your target systems or network. This can include domain names associated with your organization, IP addresses in use, open ports, software versions, and any other publicly available data that may help to identify potential vulnerabilities.
To begin our demo, let’s first take a look at one of the coolest features in Maltego, called Maltego Machines. They function as a sort of automated playbook for different types of investigations. In our case, we will use one of the default Machines to get us started with our assessment.
What we need to do is:
- Add a Domain Entity for our target organization on a new Graph
- Right-click the Entity to get the Transforms menu
- Go to the bottom to open the Machines submenu
- Click the Network Footprint L1 Machine

In just under a minute, we retrieve a comprehensive picture of the assets and records associated with the target domain, over 750 Entities, ranging from Websites, DNS records, IP addresses, AS numbers, Email addresses, and more.
Given the ever-growing adoption of cloud services, we are not surprised that the organization’s digital perimeter extended well beyond its on-premises natural boundaries by multiple service providers, including Microsoft, Google, and Salesforce. Since our scope is for on-premises assets only, we need to identify those in our Graph.
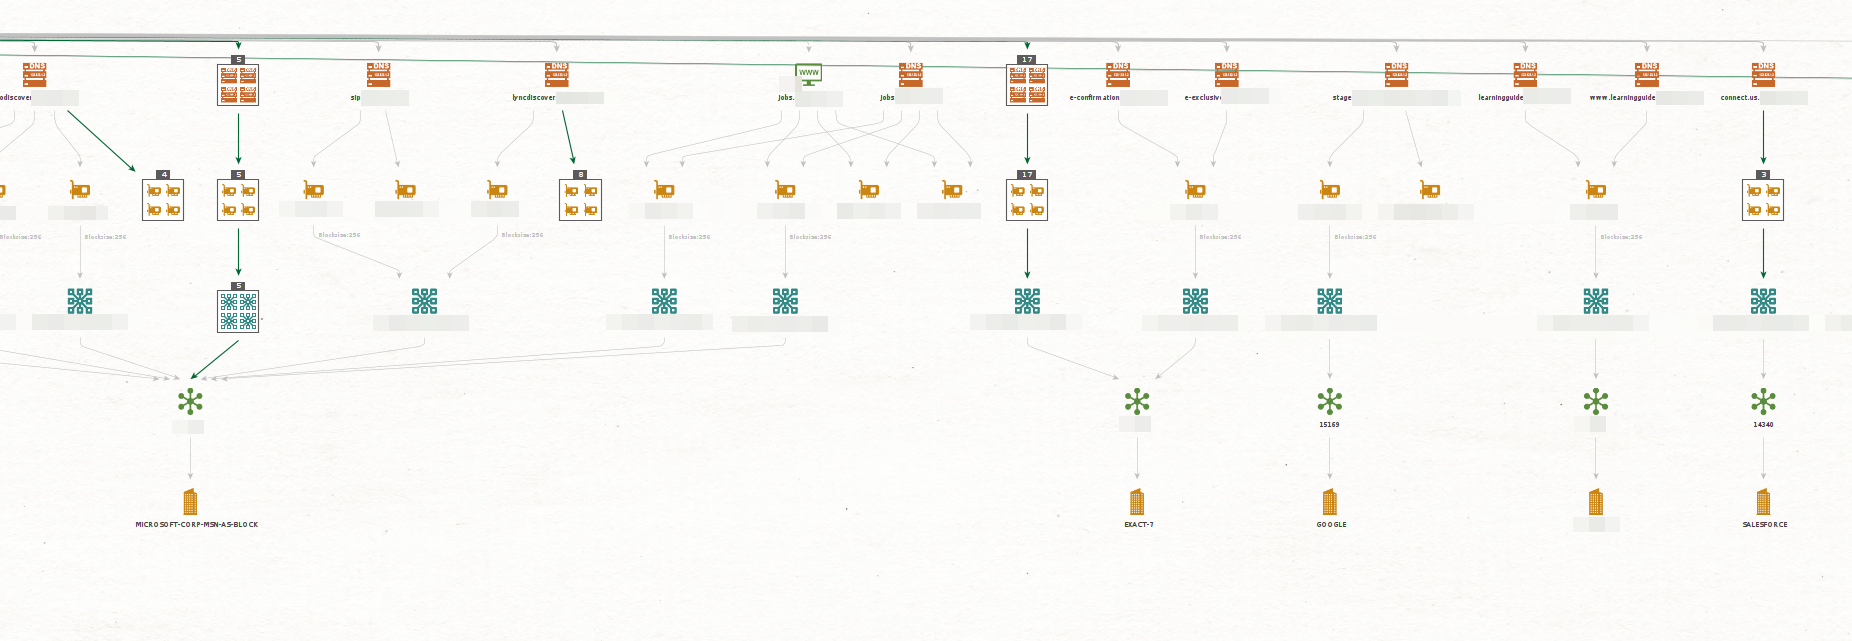
In this case, there is a Company Entity with the target’s name.
Let’s move only the associated Entities to a new graph. To do that, we can select the Company Entity and click the Add Parents button until the selection includes our initial domain. We can right-click anywhere on the Graph and select the Copy To New Graph button in the bottom left corner.
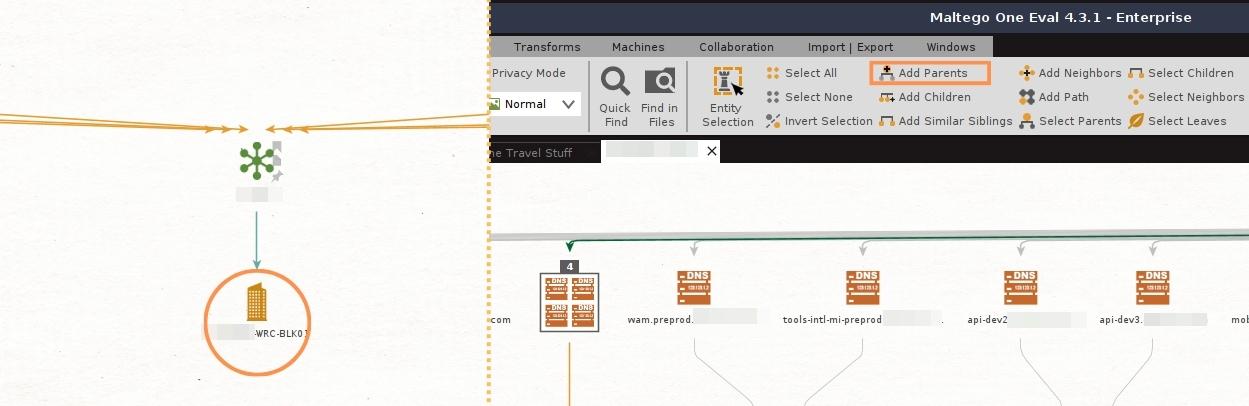
Having done that, we will now focus on mapping the attack surface of the target without including the infrastructure owned by the vendors used by the organization.
In the above image, there are some interesting subdomain names used by the target, including development (dev) and pre-production (preprod) instances. We will refer to these as Juicy instances.
Let’s find some additional Juicy instances by running the To DNS Name (interesting) [SecurityTrails] Transform on our initial Domain Entity.
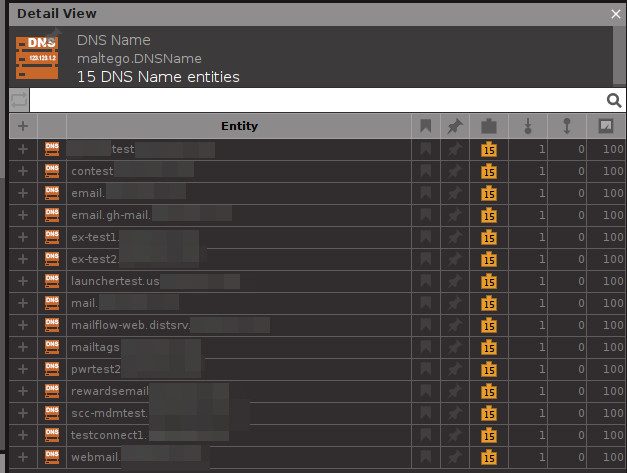
The list of results shows some additional test and mail-related instances. We can resolve the IP addresses associated with the new Entities to confirm whether these are live.
To do that, we will select the new Entities and run the To IP Address [DNS] Transform. Any instance that returns a corresponding IP address can be considered potentially live.
Since we are on IP addresses, it is possible to use Shodan to find vulnerabilities associated with online hosts. Let’s find some by selecting all the IP addresses and running the To Vulnerabilities [Shodan] Transform.
![Select all IP addresses and run the To Vulnerabilities [Shodan] Transform](/images/uploads/attack-surface-assessments_7.jpg)
Not only have we identified a critical 6-year-old vulnerability but also a number of interesting subdomains, a production security instance, as well as a possible Mobile Device Management (MDM) test server. We will come back to these in the Analyze the Information section.
We can also use Netblocks to find vulnerable assets with the help of Shodan. Since we are confident that the current Netblock Entities belong to the organization, let’s run the To Vulnerable IP Addresses [Shodan] Transform on these and re-run the previous Transform to extract the associated common vulnerabilities and exposures.
![Select Netblock Entities and run the To Vulnerable IP Addresses [Shodan] Transform](/images/uploads/attack-surface-assessments_8.jpg)
This expands the list of vulnerabilities to 93, including at least 12 critical. In other words, threat actors could exploit 93 unique attack vectors to breach this organization’s network.
We are not entirely done with IP addresses yet, as we can also use these to identify insecure open ports and outdated software versions.
Let’s start by finding open ports with the To Ports [Shodan Internet DB] and To Ports [OTX] Transforms. Maltego returned 257 unique Port Entities.
To make it easier to read, we have identified and bookmarked a few ports considered insecure by default and which should not be exposed to the internet.

Next, we will retrieve the services associated with the IP addresses. The information in the Service Entities can help us find outdated software versions, which could, in turn, be vulnerable or beyond their support lifecycles. We will again select the IP address Entities and run the To Services [Censys] and To Services [Shodan] Transforms.
Once the Transforms have finished running, we can use the Find option to search for specific software versions.
Let’s say we want to check if any servers are running Apache 2.4, released over ten years ago.
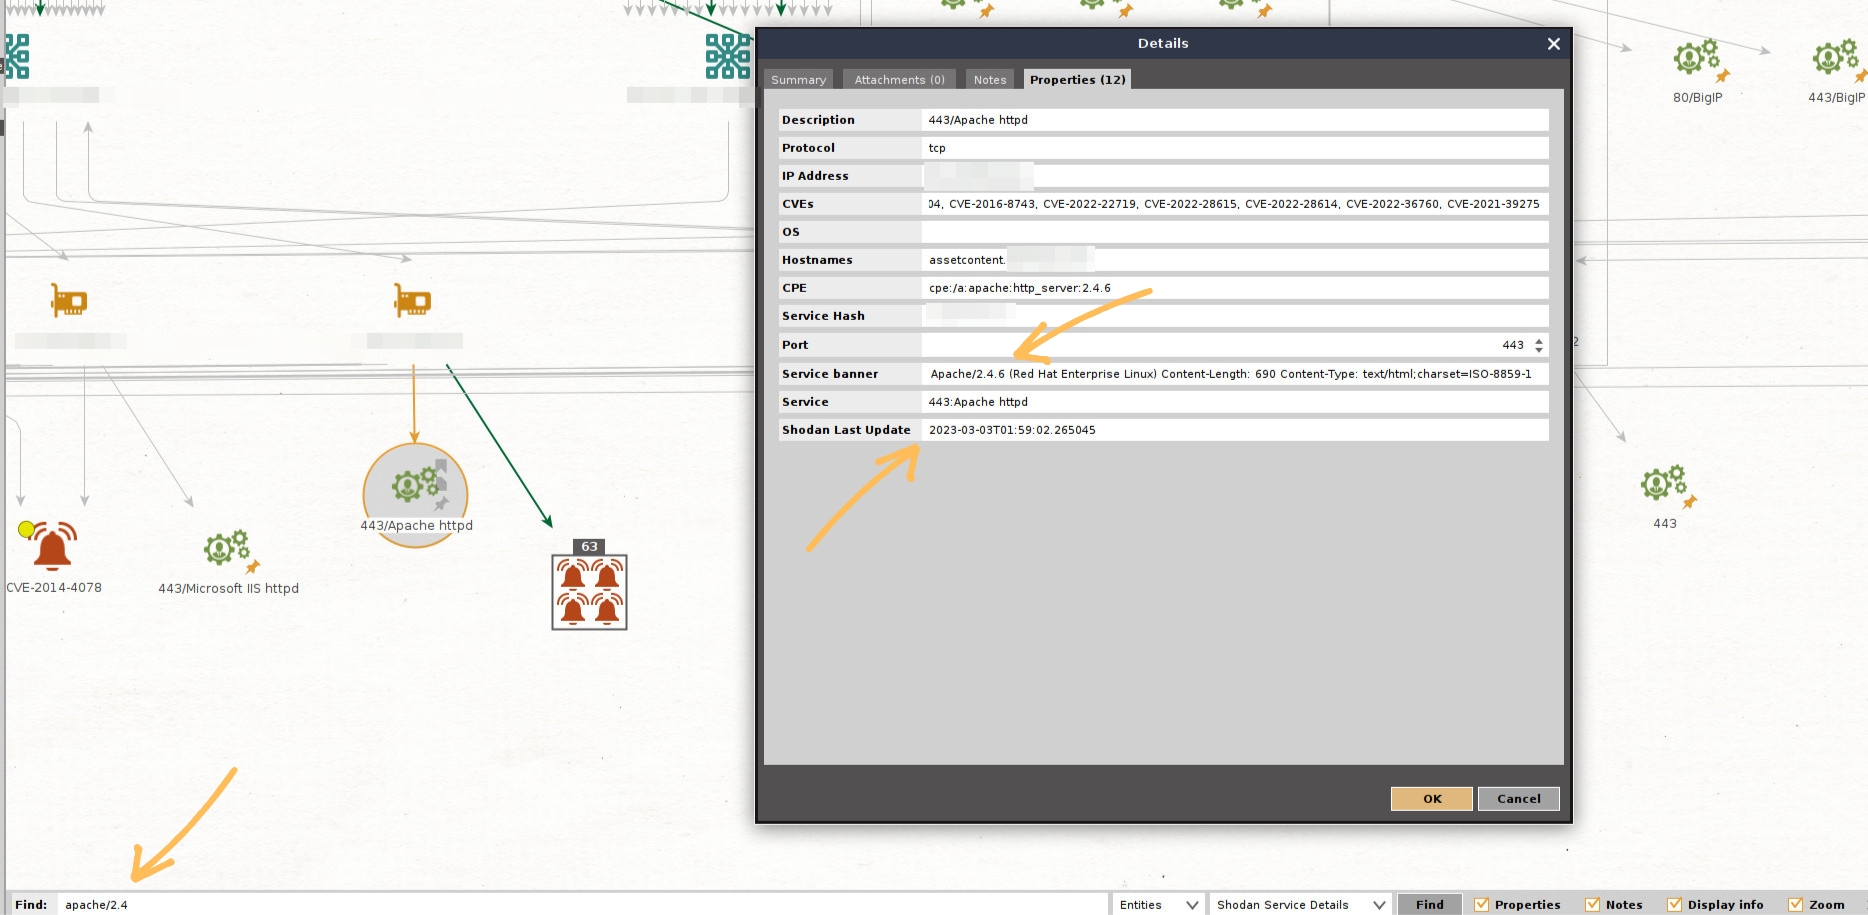
Bingo! As we can see in the above image, the service Entity contains information about the software versions, associated common vulnerabilities and exposures, and they even include a timestamp for when this was last seen.
So far, we have found multiple Juicy instances, exposed security solutions, insecure open ports, 12 critical vulnerabilities, and outdated software versions running on live instances. It’s time to move on to the next stage in our assessment.
Step 4: Analyze the Information 🔗︎
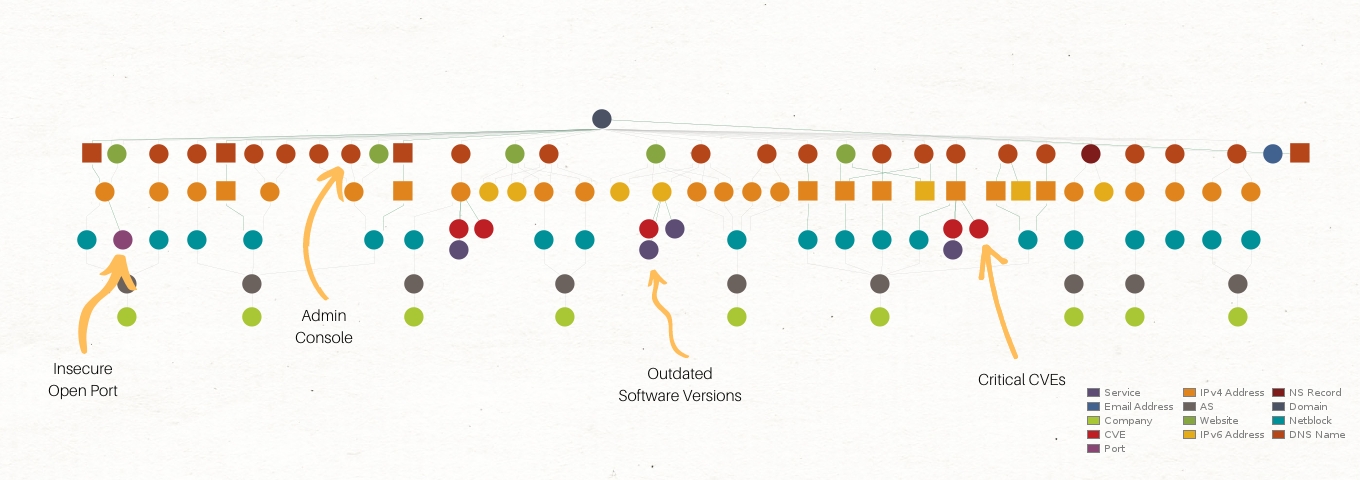
After gathering information using Maltego, we will analyze the data and identify potential vulnerabilities or weaknesses.
Let’s go through some of the security issues identified during the previous stage and discuss why these are considered a risk to the organization they belong to.
Critical Vulnerabilities 🔗︎
They increase the likelihood of exploitation, affect operations, may lead to non-compliance, and damage public perception. Companies should prioritize identifying and addressing critical vulnerabilities to minimize these risks and maintain a secure and reliable digital environment.
Insecure Open Ports 🔗︎
During the reconnaissance step, we found and highlighted ports such as:
- Port 143: This port is used for Internet Messaging Access Protocol (IMAP) traffic, which is used for email retrieval.
- Port 445: This port is commonly used for SMB (Server Message Block) traffic, which is used for file sharing and printer sharing between computers.
- Port 389: This port is used for LDAP (Lightweight Directory Access Protocol) traffic, which is used for authentication and directory services.
- Port 139: This port is also used for SMB traffic but uses an older version of the protocol that is more vulnerable to attacks.
- Port 21: This port is used for FTP (File Transfer Protocol) unencrypted traffic, which is used for transferring files between computers.
Exposing these ports to the internet can allow attackers to access and compromise sensitive information or execute remote code on a system. Limiting external exposure to these ports is generally recommended to prevent security risks.
Outdated Software 🔗︎
It may contain known security vulnerabilities that attackers can exploit to gain unauthorized access, steal data, or cause other damage. Also, the vendor may no longer support the software, meaning no new security patches or bug fixes will be released to address current or future vulnerabilities.
Juicy Instances 🔗︎
These types of instances, which include testing (Test) and staging as well as the previously mentioned development (dev) and Pre-Production (pre-prod) servers, are usually short-lived instances created for testing security patches, software upgrades, or new versions of in-house applications before moving them into Production. These servers typically get a lower level of security than production ones, making them a juicier target for hackers.
Exposed Security Solutions 🔗︎
During our assessment, we also found exposed security solutions such as ArcSight and a Mobile Device Management test server. These types of systems usually contain sensitive security data about the organization they belong to and may be targeted by attackers seeking to exploit vulnerabilities in the system or steal data.
Step 5: Develop a Remediation Plan 🔗︎
Finally, the attack surface assessment results can be used to develop a remediation plan. This can include implementing security patches, closing unsecured ports, establishing a Request for Change (RFC) that defines how to decommission Test instances, and other measures to help you reduce the organization’s attack surface.
Accelerating Your Attack Surface Assessment 🔗︎
Maltego can help security teams identify potential vulnerabilities and weaknesses in an organization’s network and assets. Following the steps in this article, you can effectively leverage Maltego’s features and conduct comprehensive attack surface assessments in minutes while using only free data resources.
If you want to learn more about vulnerability and attack surface assessment, take a look at our detailed Cyber Threat Intelligence handbook, which also covers four other typical CTI investigations.
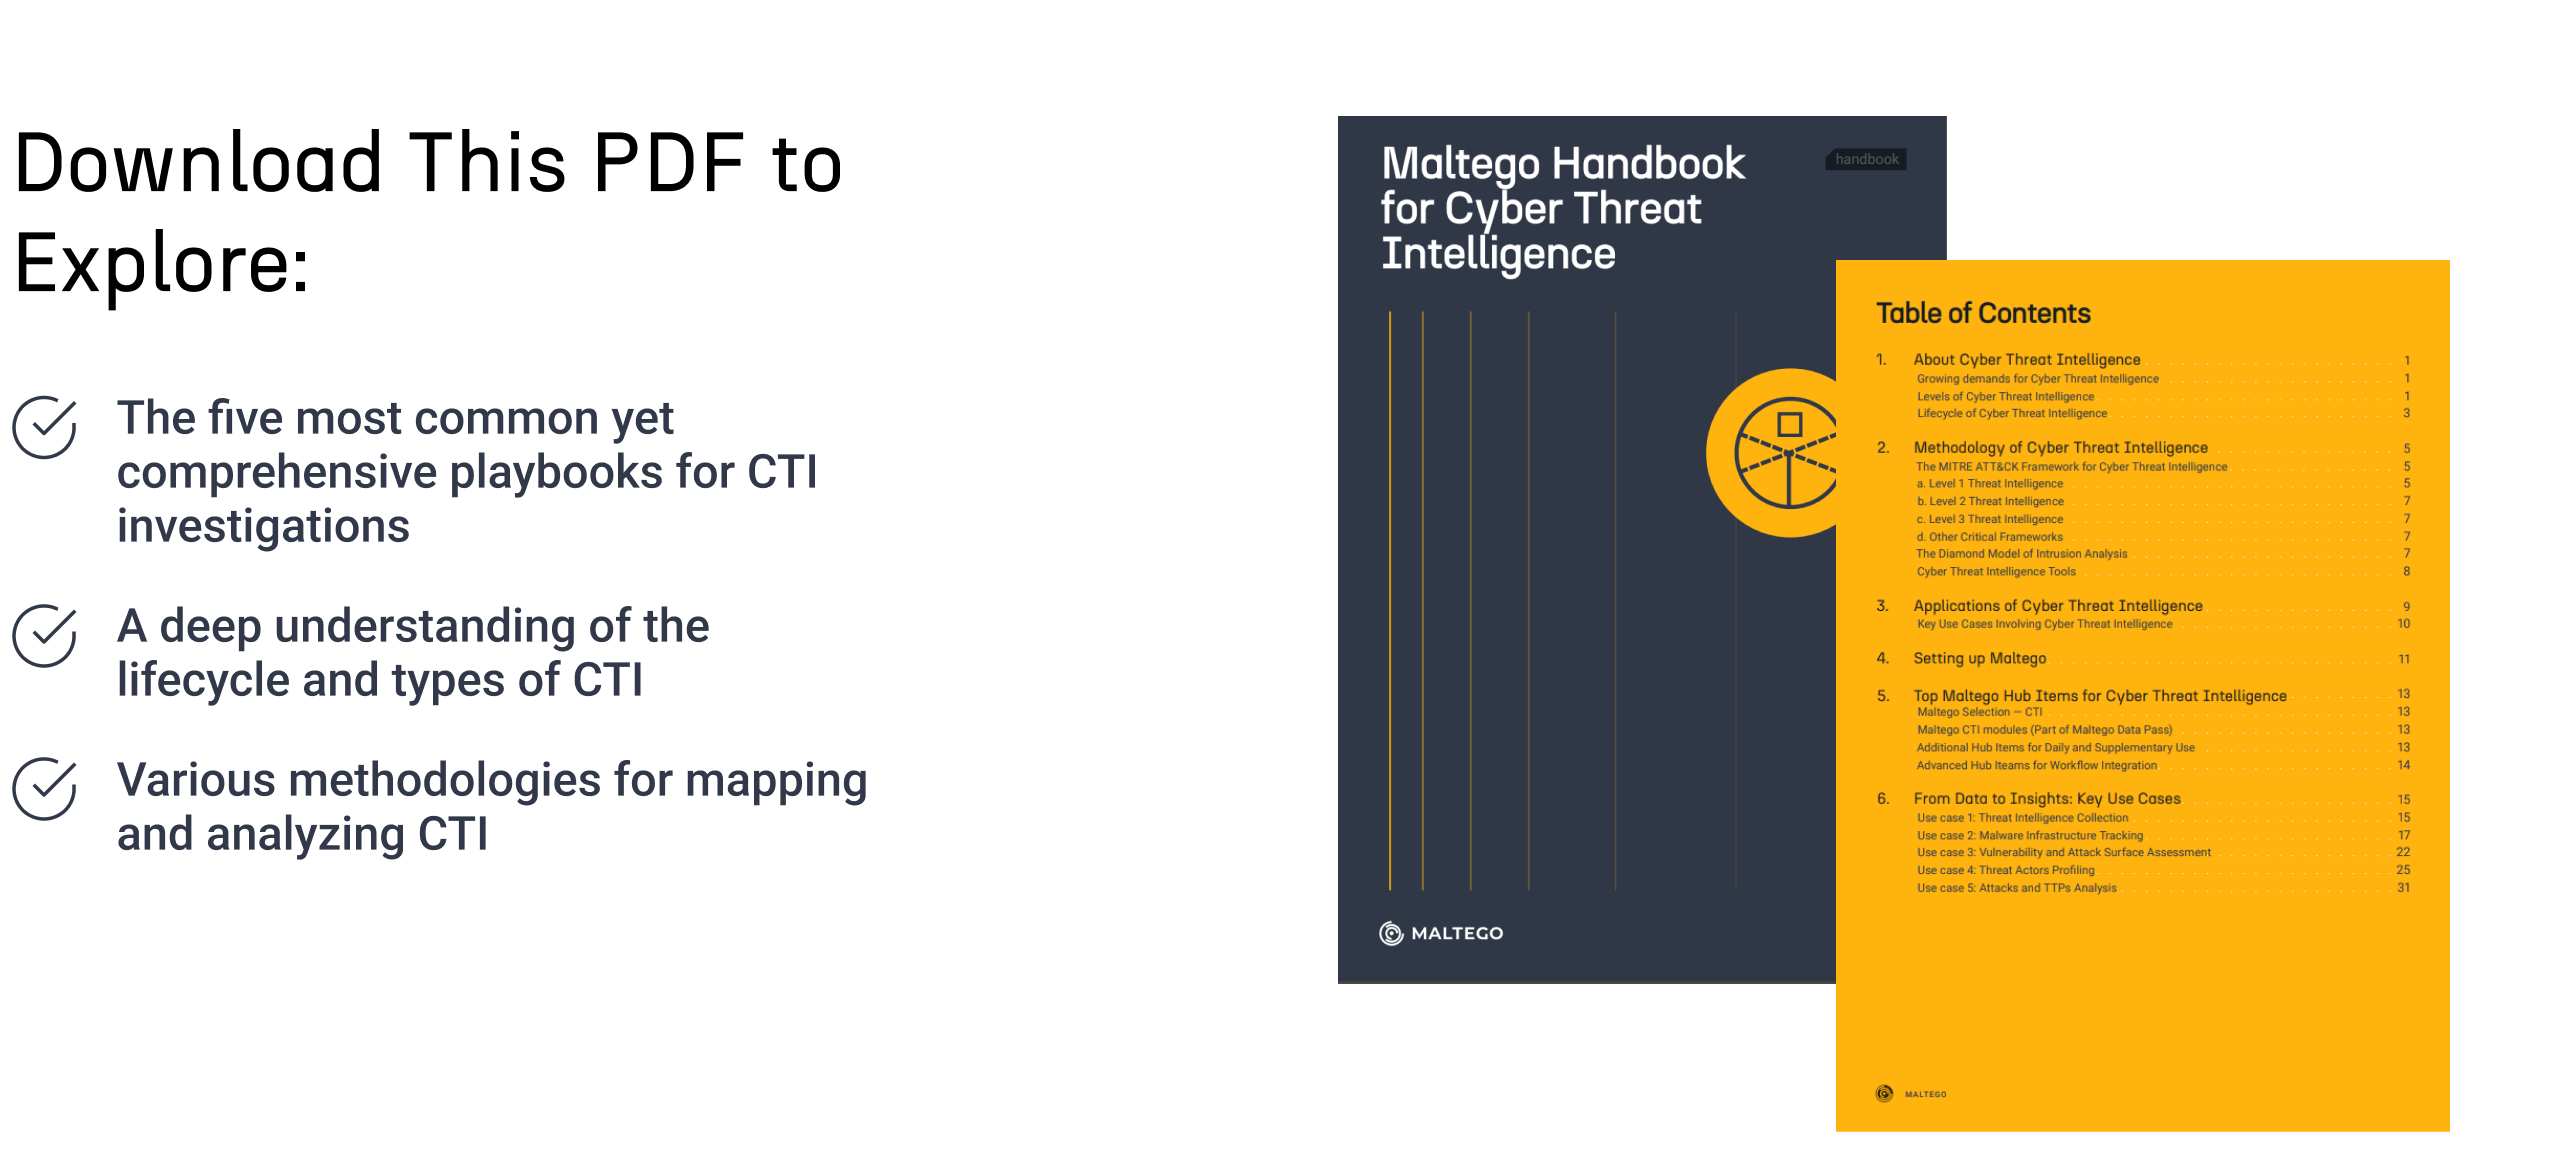
Download the resource
This was part 1 of a 2-part series on how to use Maltego for Attack Surface Assessments. In the next release, we will learn how to automate most of the techniques detailed in this article by creating our own custom Machine.
In the meantime, follow us on Twitter and LinkedIn, and subscribe to our newsletter to stay up to date on new tutorials and guides and to make sure you don’t miss the next part of the series.
Happy OSINTing!
About the Author 🔗︎

Mario Rojas 🔗︎
Mario Rojas is a former Cyber Security and Threat Intelligence Subject Matter Expert at Maltego with more than 14 years of experience in the cybersecurity field. His expertise in open-source intelligence (OSINT) allows him to effectively map and visualize complex relationships and connections between entities, from IP addresses and domain names to social media profiles and Darkweb forums.