Footprinting is a vital first step part of any reconnaissance phase, in which one gathers information about a network, system or application with the aim to narrow down the areas and techniques of attack. In this post, we show you how Maltego can help you structure and speed up the footprinting process by automating many of the involved steps in a single sweep.
How can Maltego help? 🔗︎
In a nutshell, Maltego can save you significant time spent on information gathering, processing and visualizing and lets you focus on the pattern recognition and explorative parts of your reconnaissance. Maltego can gather and connect a large amount of technical and personal data from open-source, commercial and private data sources in a single step. Next, you can play around with different visualizations in the View Tab of your graph to identify outliers and potential weak spots.
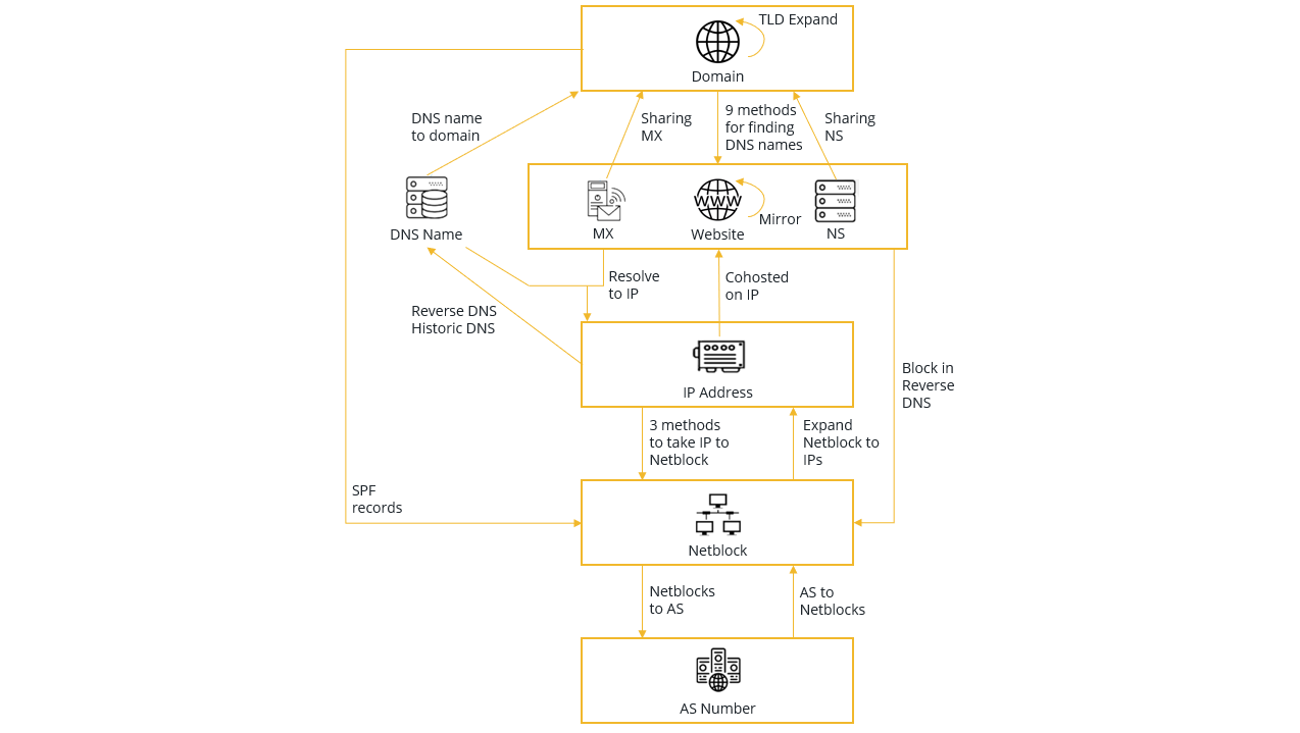
In this article, we will focus on network footprinting, whereby we gather information around the technical infrastructure of a target domain, e.g. subdomains, IP addresses, WHOIS information, e-mail addresses, and the relationship between the target domain and other Entities. Within Maltego, we have devised a structured methodology which we follow when conducting a network footprint, involving a series of Transform runs for each step of the footprinting process. This process is outlined in the data model in the image below.
To read more about the entire network footprinting methodology and the corresponding Transforms to run this on Maltego, check out our detailed guide here.
Fortunately, it is not required to remember every step of this footprinting process thanks to the concept of Machines in Maltego (Cue collective sigh of relief! :D). Machines allow you to script Transforms together and have them run sequentially in an automated fashion, thereby simplifying repetitive steps of an investigation.
Let’s get started! 🔗︎
1 Download Maltego
First, download and install Maltego Desktop Client by picking the right installer for your machine here. The quickest way to get started is with the free Community Edition, for which you will additionally register an account here.
2 Pick a target
Next, pick a target domain. In our example, we look at “paterva.com”.
3 Choose a type of Machine
Out-the-box Maltego comes with three Machines for network footprinting for L1, L2 and L3 footprinting stages, which vary in exploration depth.
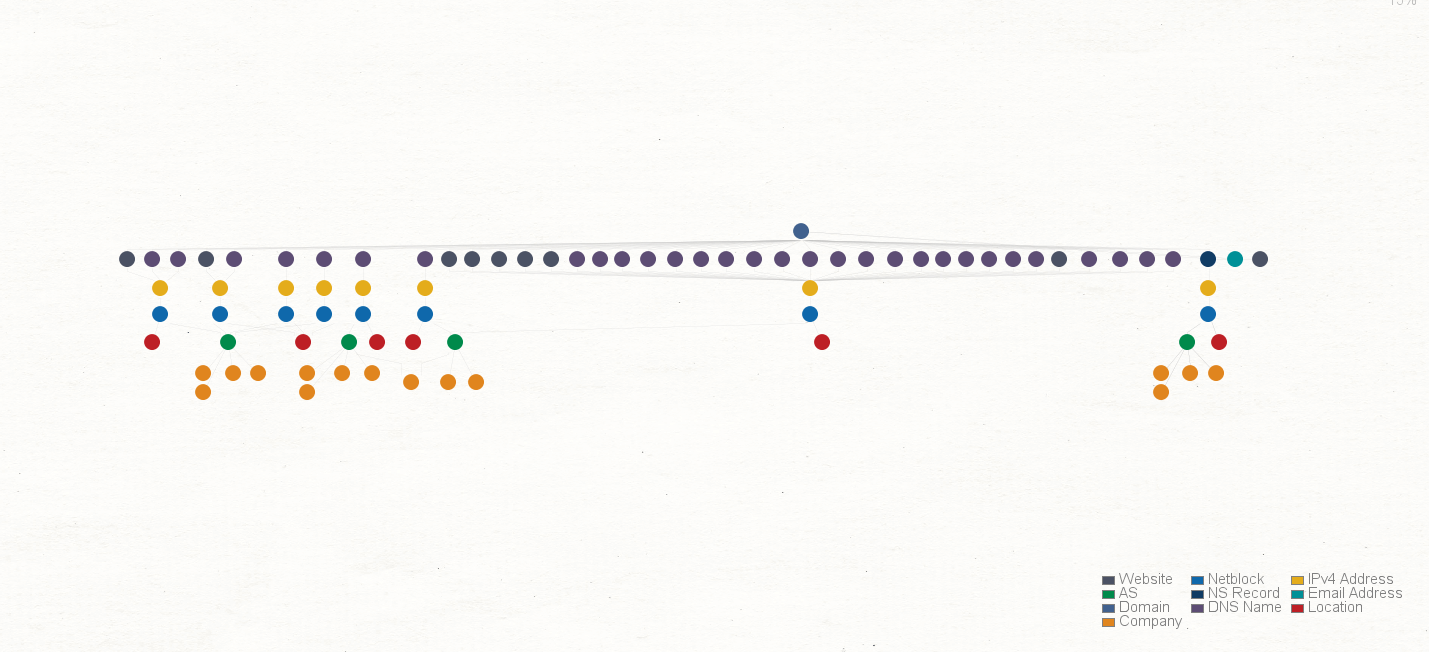
- Footprint L1 (basic): This is the most basic footprinting machine and runs through the data model from Image 1 straight down from top to bottom without looking at any shared infrastructure or historical DNS records. As you can see in the results (Image 3), the graph contains the Netblocks, Internet Service Providers, other domains, E-mail addresses, DNS servers, and Mail servers used by Paterva.
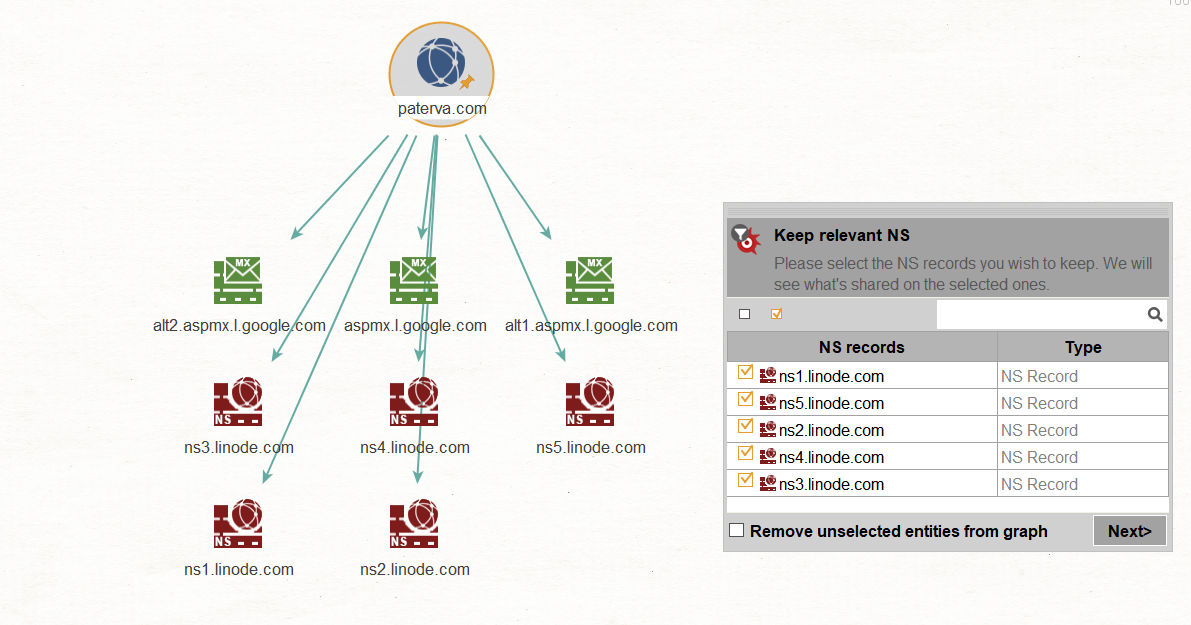
- Footprint L2 (moderate): Machine L2 includes all the Transforms in Machines L1, and additionally looks for additional domains related to the original domain by looking for shared infrastructure of its name servers (NS) and mail servers (MX). The Machine will also look for other websites hosted on the same IP addresses. The machine also has user filters, which prompt the user to manually inspect results and decide with ones to continue with. User filters allow us to choose which name servers, mail servers and websites are hosted by the target organization or by an ISP. This is done to prevent the Machine from looking for shared infrastructure on DNS names that are not hosted by the target. An example of a user filter when running Footprint L2 on the domain paterva.com is shown in the image below.
From visual inspection we find that Paterva’s mail is hosted by Google and their name servers are hosted by Linode. Therefore, you would not want the Machine to continue to run Transforms that look for shared infrastructure on these Entities as you’ll follow the rabbit hole all the way to Google’s (and Linode’s) infrastructure!
- Footprint L3 (very comprehensive): If you want to dig deeper, you can run Footprint L3, which runs the same Transforms as Footprint L2 but additionally looks at historical / reverse DNS records on the netblocks that are found to find additional DNS names belonging to the target. Again, the Machine will use user filters to allow the user to specify which of the netblocks are still relevant. Footprint L3 will also run a Transform named ToServerTechnologyWebsite on selected website Entities on the graph and returns the name of different server technologies that are used on that website. Running this Transform provides an easy way to identify which technologies are used commonly across many of the target’s websites as well as outliers - the (sometimes more outdated) technologies that are only be used on one or two servers.
This is one possible strategy of conducting network footprinting in a structured and efficient way. If you have any questions about this post or using Maltego for footprinting or other use cases, reach out on Twitterand follow us to stay tuned with what’s fresh in the Maltego world.
Disclaimer: Never perform any active action against any network except with written consent of the owner!


