In Maltego, bits of information are represented by Entities, which are an integral part of Maltego, without them no investigation is possible. Therefore, more than 50 pre-defined Standard Maltego Entities have been provided to help investigators represent their own data and data collected from other sources on their graph.
Whereas previous articles have guided you through a number of different Entity features, such as the customization of Entity overlay icons, this article will show you how to create your own custom Entities for existing data integrations.
But Why Create Your Own Entities in The First Place? 🔗︎
Though Maltego makes its own Standard Entities available through the installation of the Maltego Standard Transforms Hub item, and even more Entities are within reach through Maltego’s data partners‘ Hub items, there will be instances when investigators will need to create new, custom Entities to better represent their specific data points.
For example, Maltego’s Person Entity is clearly different from the IP address Entity, as can be seen below:

But what if an investigator needs to further segregate Entities based on more specific criteria? And what about data points that are not currently captured by existing Entities?
Different Types of Entities for Different Types of Investigations 🔗︎
A law enforcement investigator may need to visually differentiate between different types of persons while working in Maltego, i.e. a person of interest, a suspect, and a witness.
Similarly, a threat hunter may need to categorize types of persons in Maltego graphs by their relationship to the organization, i.e. types of employees by teams or business areas, or by types of employees by contract type such as direct employees, freelancers, and so forth.
How to Create a New Maltego Entity 🔗︎
Let us use the law enforcement investigation scenario. In this example, the investigator wants to differentiate between three different types of person: a person of interest, a suspect, and a witness.
Since Maltego already has a Person Entity containing a first name and a surname property that are automatically combined into a “full name”, we do not have to reinvent the wheel—we simply want to expand on this concept.
The first step to creating these three new Entities begins by navigating to the Entity Tab and clicking on the drop-down area of the New Entity Type button. Two choices will be offered:
- New Entity Type, and
- New Entity Type (Advanced)
In short, the advanced Entity creation will provide additional options throughout the creation process.

By default, clicking the icon area of the button will launch the wizard for the basic Entity creation process.
Creating New Custom Maltego Entities for Law Enforcement Investigations 🔗︎
In this example, we will assume that the law enforcement investigator has selected the Advanced option. Once the wizard is launched, five steps need to be taken to create the new custom Entity.
Let us begin!
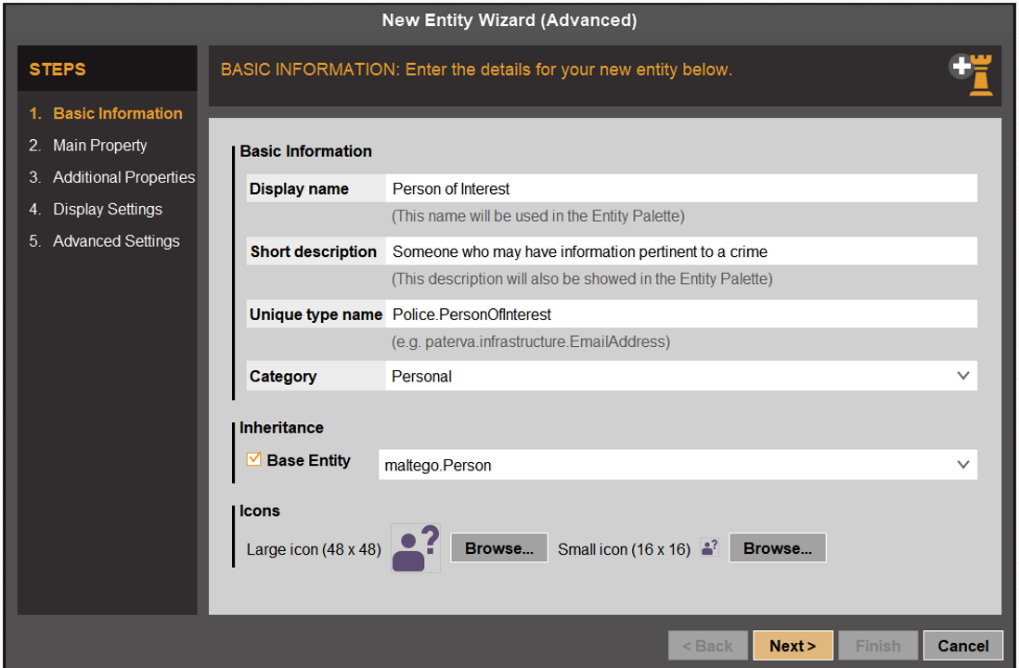
Step 1: Provide the Entity’s Basic Information 🔗︎
To get things started, the investigator will have to determine the new Entity’s basic information, inheritance, and icons. Let start with the basic information.
Basic Information 🔗︎
The Display name is the name that will appear on the Entity palette. The Short description will help clarify the Entity’s purpose and is displayed below the Entity type in the Entity palette.
The Unique type name serves as an identifier which is formatted as [prefix with the creator’s organization] [.] [Entity name]. For example, maltego.person is the unique type name of the Maltego Person Entity.
The Category can be chosen from a drop-down menu of the options representing the different sections in which Entities are segmented on the Entity palette.
Entity Inheritance 🔗︎
Moving on to Inheritance. Maltego Transforms are designed to run only on specific Entities. Inheritance allows the new custom Entity to inherit all the Transforms that run on a specific base Entity (a.k.a. parent Entity).
This is beneficial to our law enforcement investigator since they are looking for a way to create more specific people Entities for their investigations. As mentioned before, we want to extend the capabilities of the Person Entity, and will therefore select the “maltego.Person” Entity as our base Entity to extend.
Entity Icon 🔗︎
Lastly, picking the new Entity’s icon. By clicking on the Browse button, the investigator will be able to choose from a wide array of icon options available. This is how the Entity will be shown both in the palette and on the graph.
Should you prefer to use your own icons, these can be uploaded via the Manage Icons window. The image below shows the information captured, as well as the icon that was chosen.
Step 2: Define the Entity’s Main Property 🔗︎
The Entity’s main property represents its value, and this is what will be displayed on the Maltego graph by default. Since the investigator has chosen to inherit the Person Entity as the base Entity for the new custom Person of Interest Entity, two options will be available:
- Using the main property of the inherited Entity type, or
- Creating a new custom main property.
In our scenario, the investigator chooses to use the main property of the inherited Entity type because the base Entity—the Person Entity—already uses “full name” as its main property and can therefore be reused for our new Person of Interest Entity. Note that in doing so, the fields shown in the image below are disabled.
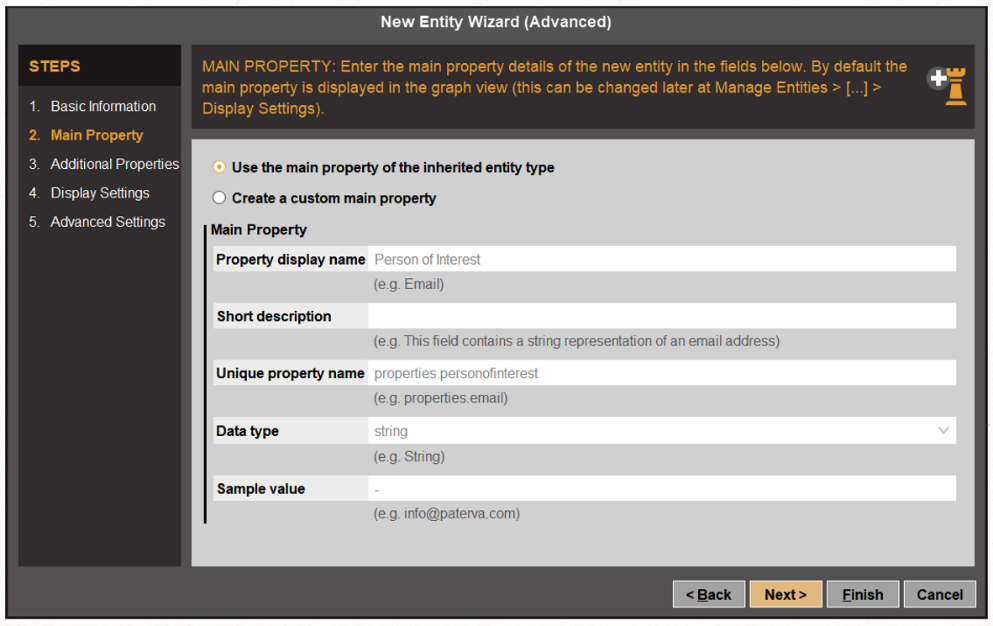
We only recommend creating custom main properties when absolutely necessary, and to rely on a Transform developer’s expertise when doing so. This will ensure both the original and the new properties are populated and allow both inherited and new Transforms to work.
Step 3: Determine Additional Properties (Optional) 🔗︎
At this stage, the investigator can incorporate additional properties for the Person of Interest Entity. Properties are additional pieces of information and can be visualized in the Property View. They can also help enhance the visual context of the graph by rendering them as an icon/color or text overlay on the graph, which is especially useful when working with large datasets.
The investigator in our example finds it useful to visualize the person of interest’s country of residence for the purpose of corroborating this location with other locations provided by other pieces of evidence for attribution purposes.
The property will be added by:
- Clicking on the Add Property button
- Populating the new property’s name and display name
- Selecting its type
The image below shows the data captured for that purpose.
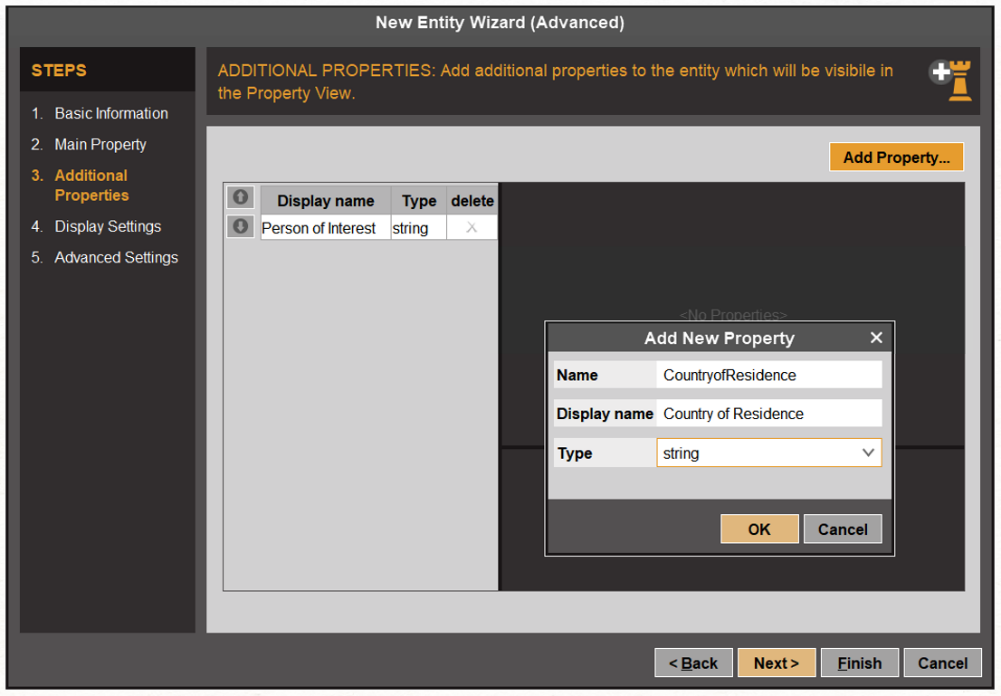
Note: Additional configurations to the Country of Residence Property can be set when clicking on an item from the Property list on the left side of the window.
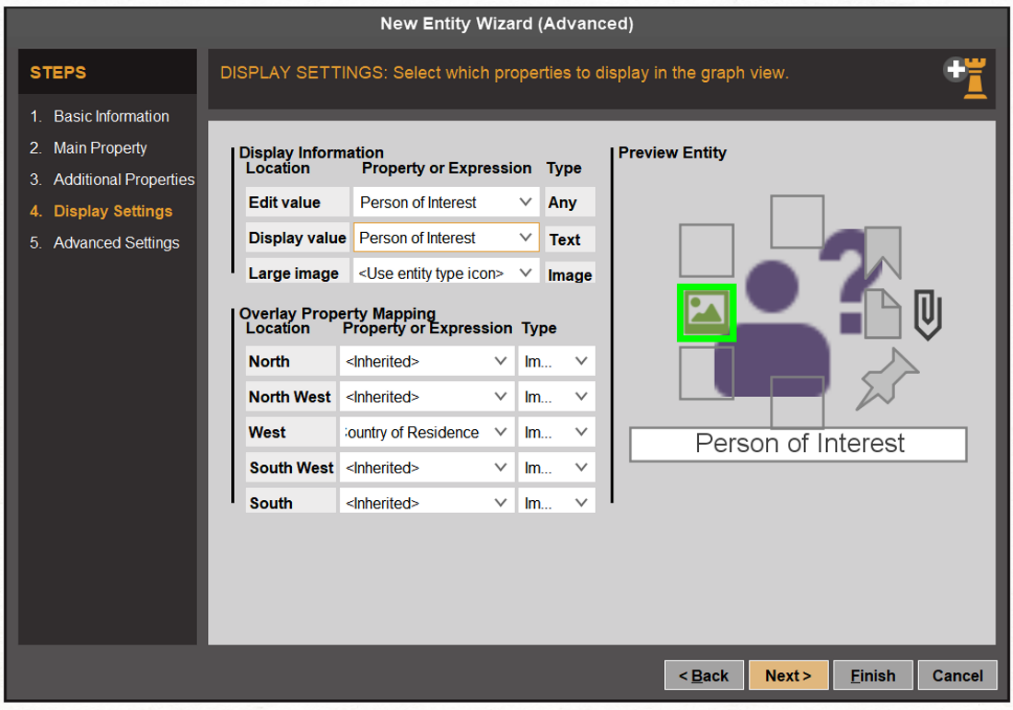
Step 4: Choose the Display Settings 🔗︎
At this point, the investigator will need to determine the following:
- Edit Value: The field which can be edited when double-clicking on the Entity’s text on the graph
- Display Value: The property that is displayed on the graph
- Large Image: A property that can be mapped to the main icon to display instead of the Entity’s type-icon
- Overlay Property Mapping: The location of additional Properties in relationship to the Entity’s icon
In this case, our investigator selects the Country of Residence Property and sets that it be shown as an image on the West position of the Entity.
Step 5: Determine the Entity’s Advanced Settings 🔗︎
In the final step, the investigator can define elements, such as the plural form that will be used for the Person of Interest Entity, and whether or not the Entity will be displayed in the palette by default.
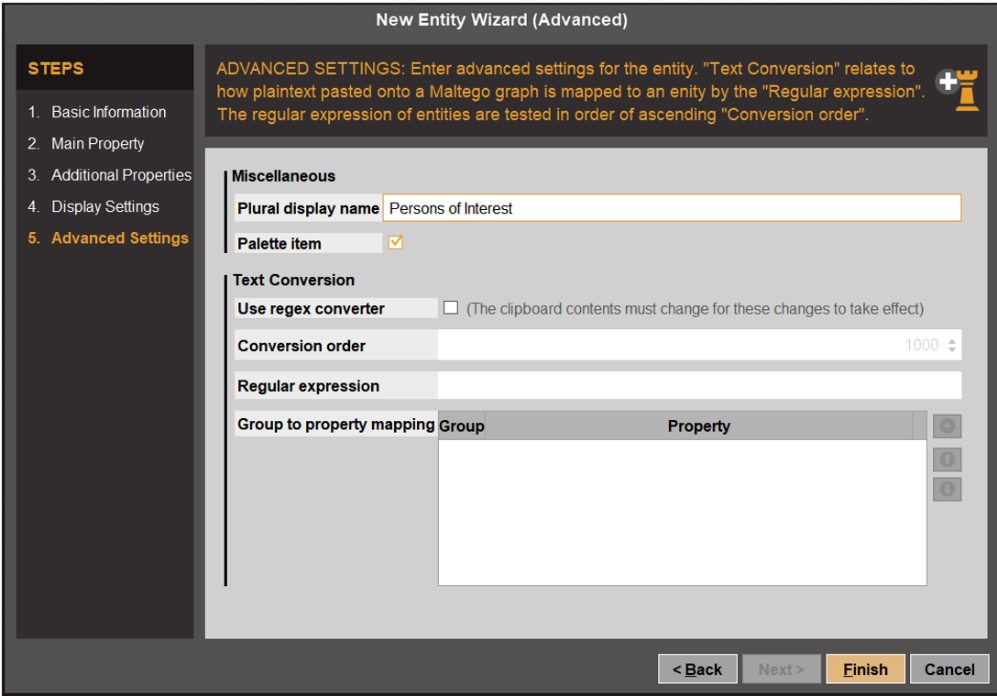
Note: Advanced element customization related to text conversion with regex can be set up in this step. You can read more about these here.
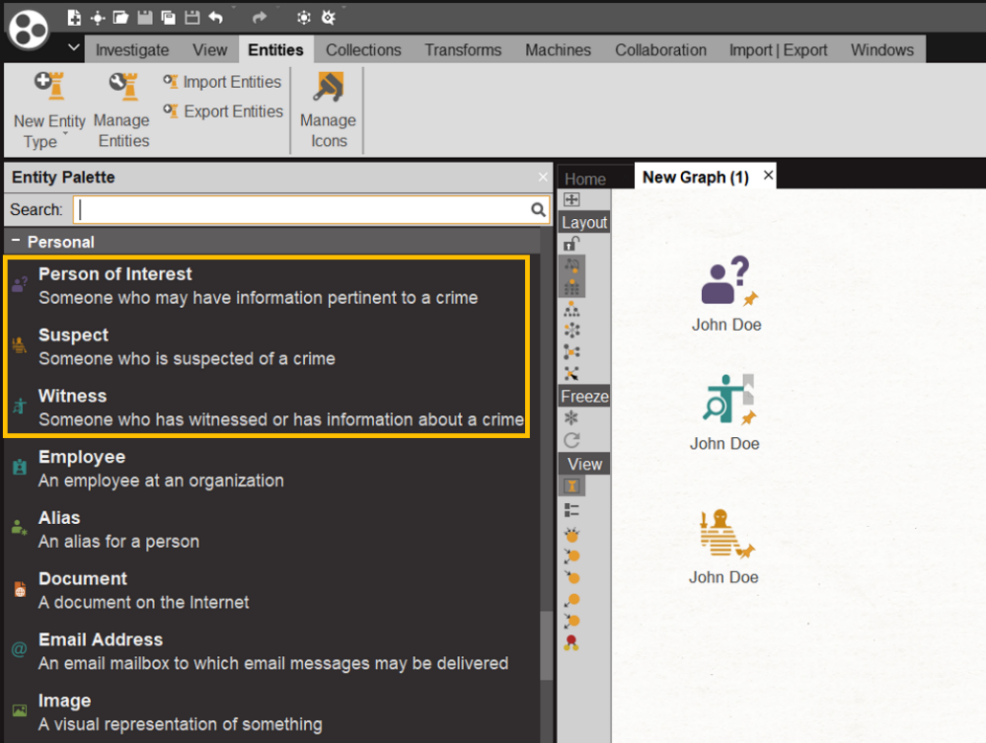
How the New Custom Entities Look on Maltego 🔗︎
Since our investigator is creating three custom Entities, the Entity creation process outlined above will need to be repeated twice more to create the Witness and Suspect Entities. The following image shows how the new custom Entities will look on the graph and the palette.
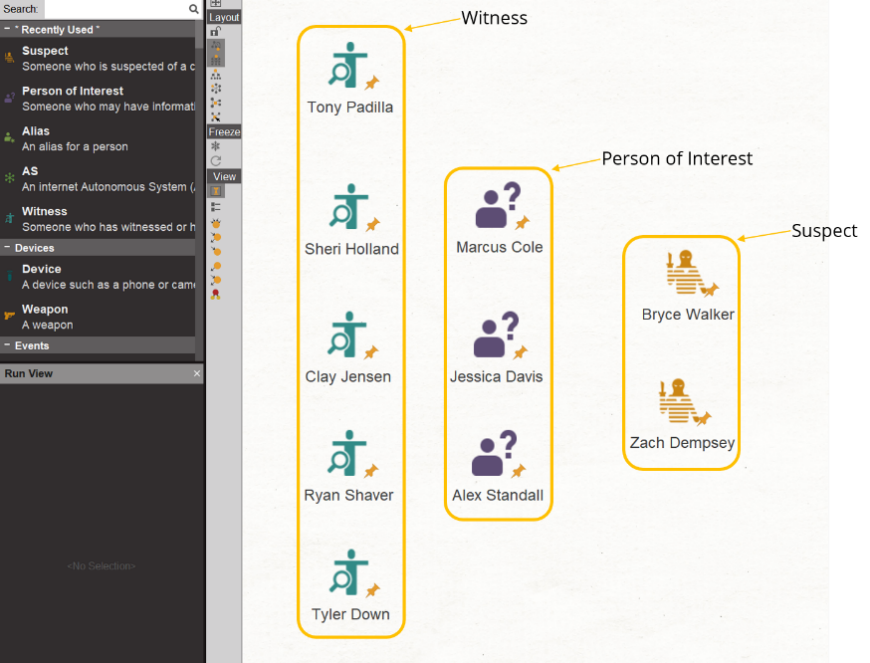
In practice, an investigator would gather initial leads and pieces of evidence for their current investigation. The collected information could then be further analyzed with Maltego. In doing so, they would be able to visually segregate the different people involved in the investigation by using the newly created custom Entities.
The image below portrays the results of grouping a total of ten people into the three different categories, wherein three are persons of interest, two are suspects, and five are witnesses.
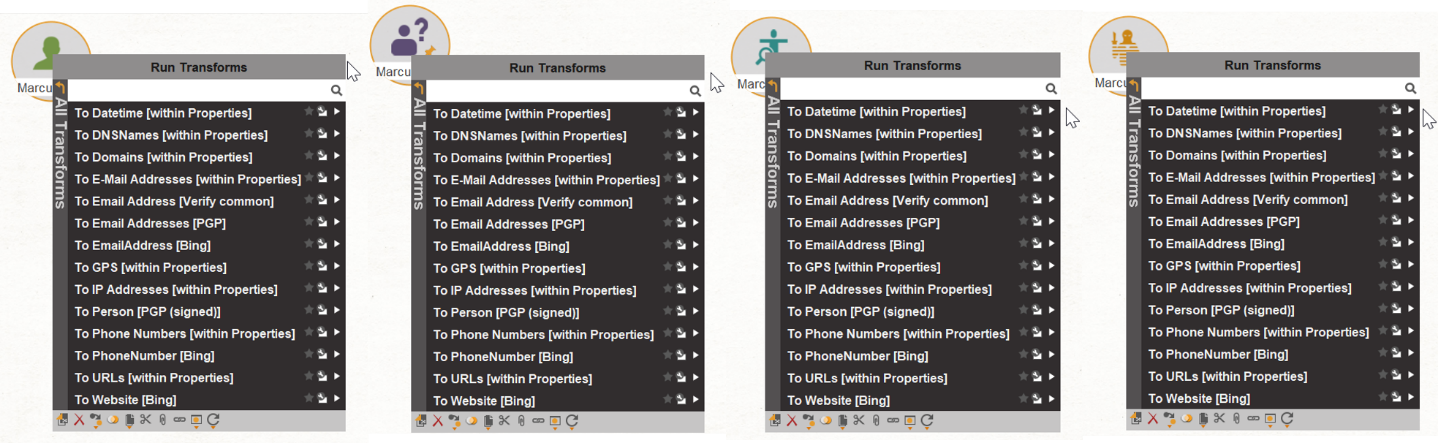
Remember, running Transforms on these three custom Entities is now possible due to the Inheritance property that was determined while creating them. As you can observe in the image below, the same Transforms are offered for the Person Entity (i.e. the base Entity), and for the Person of Interest, Witness, and Suspect Entities.
Starting a Person-Based Investigations with Custom Maltego Entities 🔗︎
Taking these Entities as a starting point, the investigator could conduct a social media footprint with Maltego. This means they would attempt to retrieve the different profiles these subjects may use across different social media platforms and explore their connections, posts, and other relevant information in search for new pieces of evidence.
Depending on the initial findings and the type of crime being analyzed, pivoting into other types of investigation such as a network footprint, reverse image searches, or looking for possible attribution would also be possible with Maltego.
Overall, the creation of the new custom Entities has made it easier to visually identify the different roles of the persons involved in the investigation, which in turn make it easier to prioritize and guide the type for analysis carried out on each of them.
Create Your Own Custom Entities According to your Organizational and Investigative Needs 🔗︎
The fun does not stop here! Maltego allows all its users to share these custom Entities to improve collaboration and encourage process-standardization by utilizing the available export and import functions.
Go ahead and explore these and other Entity-related features for yourself.
Follow us on Twitter and LinkedIn or subscribe to our email newsletter for new use cases, exciting product updates and news!