Making investigators’ Lives Easier 🔗︎
More than ever, investigators need data to solve their cases, and they need to connect this data across many sources and silos, both public and proprietary. Not only do they rely on access to this disparate data, but they also need to visualize patterns and find correlations in it to draw conclusions.
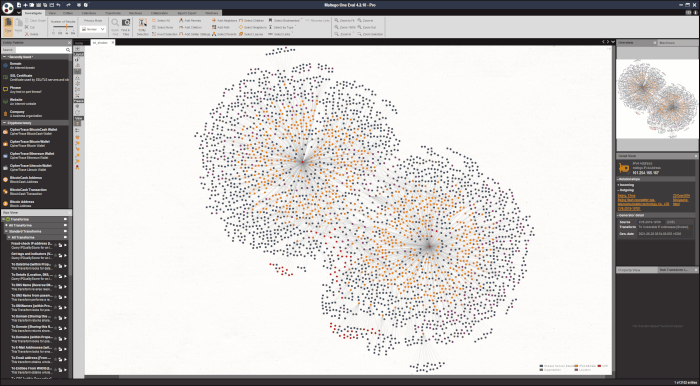
This is where Maltego shines: It allows investigators to seamlessly connect to dozens of data sources from a single intuitive graph UI and to map out the underlying data interactively in visually appealing ways. Maltego connects to over 70 different APIs and data sources out of the box via our Transform Hub, but, more importantly, it can also be extended to connect to your own proprietary data sources, using simple Python-based wrappers that can be created in minutes.
This could be the UI powering your data
Integrating Maltego with Your Own Data Sources 🔗︎
There are many reasons to connect custom data sources to Maltego. Most commonly, we see users connect to custom or internal databases, such as log management services or data warehouses, sensitive local data in the form of CSVs or databases, or even niche APIs that they need access to and for which no standard integration exists yet.
These custom integrations consist of so-called Transforms: Minimal functions, hosted on a server/machine you control, which consume Maltego Entities (like IP addresses, names, or email addresses), query an underlying API, and return new Entities to be added to your Maltego graph.
Custom Transforms are easy to create using our open-source TRX library. Using the TRX library, the steps needed to create a new integration from scratch are as follows:
- Install the library via pip (takes seconds)
- Initiate a new project using the built-in project initializer (takes seconds)
- Write your first Transform (takes a few minutes)
- Deploy your TRX server (usually takes 5 minutes to half an hour)
- Connect the TRX server to the public TDS so that Maltego clients can use your integration (takes a few seconds – now faster than ever!)
New Maltego developers are sometimes confused by the last step. Why can’t I just spin up the Transform locally and start running it immediately? What is a TDS and why do I need it? The answer to the first question is: You can run your Transforms locally (see here), but then others won’t be able to use them. That’s where the answer to the second question becomes relevant: The TDS (Transform Distribution Server) is a proxy that connects one or more TRX servers to many Maltego clients remotely so that your whole team can use the Transforms you create.
In other words, the TRX server is a runner that holds only the business logic of the Transform, while the TDS holds the metadata of what Transforms exist, what they do, and where they’re hosted.
Setting Up a TDS – Now Easier Than Ever 🔗︎
In the past, configuring Transforms on the TDS was somewhat of a tedious task. Developers were required to manually set up each Transform’s name, URL, description, input type, and other metadata. This can take a while and is, at times, error-prone, especially when setting up many Transforms at once.
We have now upgraded the TRX library to make this process easier than ever. Instead of manually configuring Transforms in the TDS after the time of deployment, the entire Transform configuration can now be written right into the Transform code using a python decorator and, from this, a CSV file can be generated that contains the full configuration for every Transform in the project.
Here’s what this looks like in the code:
from extensions import registry


@registry.register_transform(
    display_name='Greet Person',
    input_entity='maltego.Phrase',
    description='Returns a phrase greeting a person on the graph.',
    output_entities=['maltego.Phrase'],
    disclaimer='This disclaimer has to be accepted before this transform is run'
)
class GreetPerson(DiscoverableTransform):

    @classmethod
    def create_entities(cls, request, response):
        ...
As you can see, all TDS-related metadata is added to the Transform using the register_transform decorator.
For a full walkthrough of how this works, see the TRX documentation on Github.
This style brings several benefits:
- Tighter coupling of related documentation, specification, and implementation. When writing your Transform or looking at Transform code, developers can now also see and edit the information about what the Transforms is advertised as, its description, and its input/output Entity types.
- Quicker configuration on the TDS: Just upload the generated CSVs and you’re done!
- Since the metadata is now co-located with the source code, it’s also version-controlled.
- For advanced users, this decorator pattern also makes it easier to generate large integrations with repeated patterns. Nothing stops you from generating dozens of Transforms dynamically (e.g. in a for-loop) to create “templated” Transforms for many similar endpoints all at once, while still managing the correct metadata for each created Transform with ease.
Using this new decorator pattern drastically shortens the time it takes to get your first Transforms live, as well as the time it takes to make additions and iterative improvements to them. We hope this is a useful addition to your toolbox and can’t wait to see what you build with it!
To learn the ins-and-outs of integration design and development, make sure to check out our fully fledged developer guide Building Integrations for Maltego, along with the corresponding cheat sheet!
Don’t forget to follow us on Twitter and LinkedIn and sign up to our email newsletter, so you don’t miss out on updates and news!
Happy investigating!


 4.5 rating


