The Maltego Community Edition (CE) is the free and non-commercial version of the Maltego Desktop Client and the quickest way to get started with Maltego. While Maltego CE is limited in its capabilities, users can still use Maltego CE to carry out basic OSINT investigations. In this quick beginners’ guide, we show you how to set up your CE.
Downloading Maltego 🔗︎
You can download the Maltego Desktop Client here for your Windows, Mac, or Linux devices. The Maltego Desktop Client can also be installed on Kali Linux and Parrot Linux.
Next, you need to create your Maltego ID account to access Maltego CE.
Registering for Maltego ID 🔗︎
To use Maltego CE, you need to create an active Maltego ID account here with a business or school email address. Once you complete the registration, you will receive an activation email sent to the email address you use for registration.
After successfully creating your Maltego ID account, you can open your Maltego Desktop Client and use the Maltego ID login credential to access Maltego CE.
Logging in to Maltego CE 🔗︎
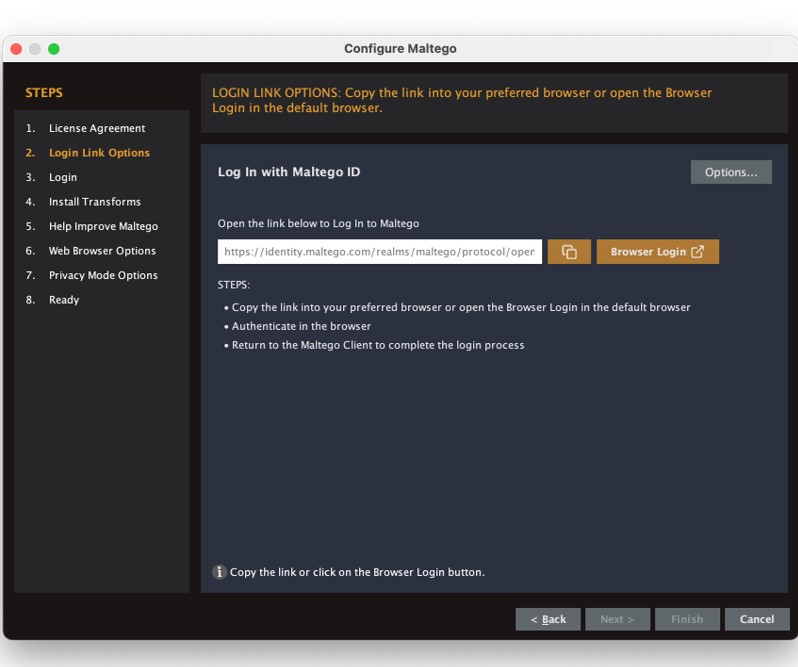
When you run Maltego for the first time, after agreeing to the License Agreement, you can proceed to log in with your Maltego ID account on your browser.
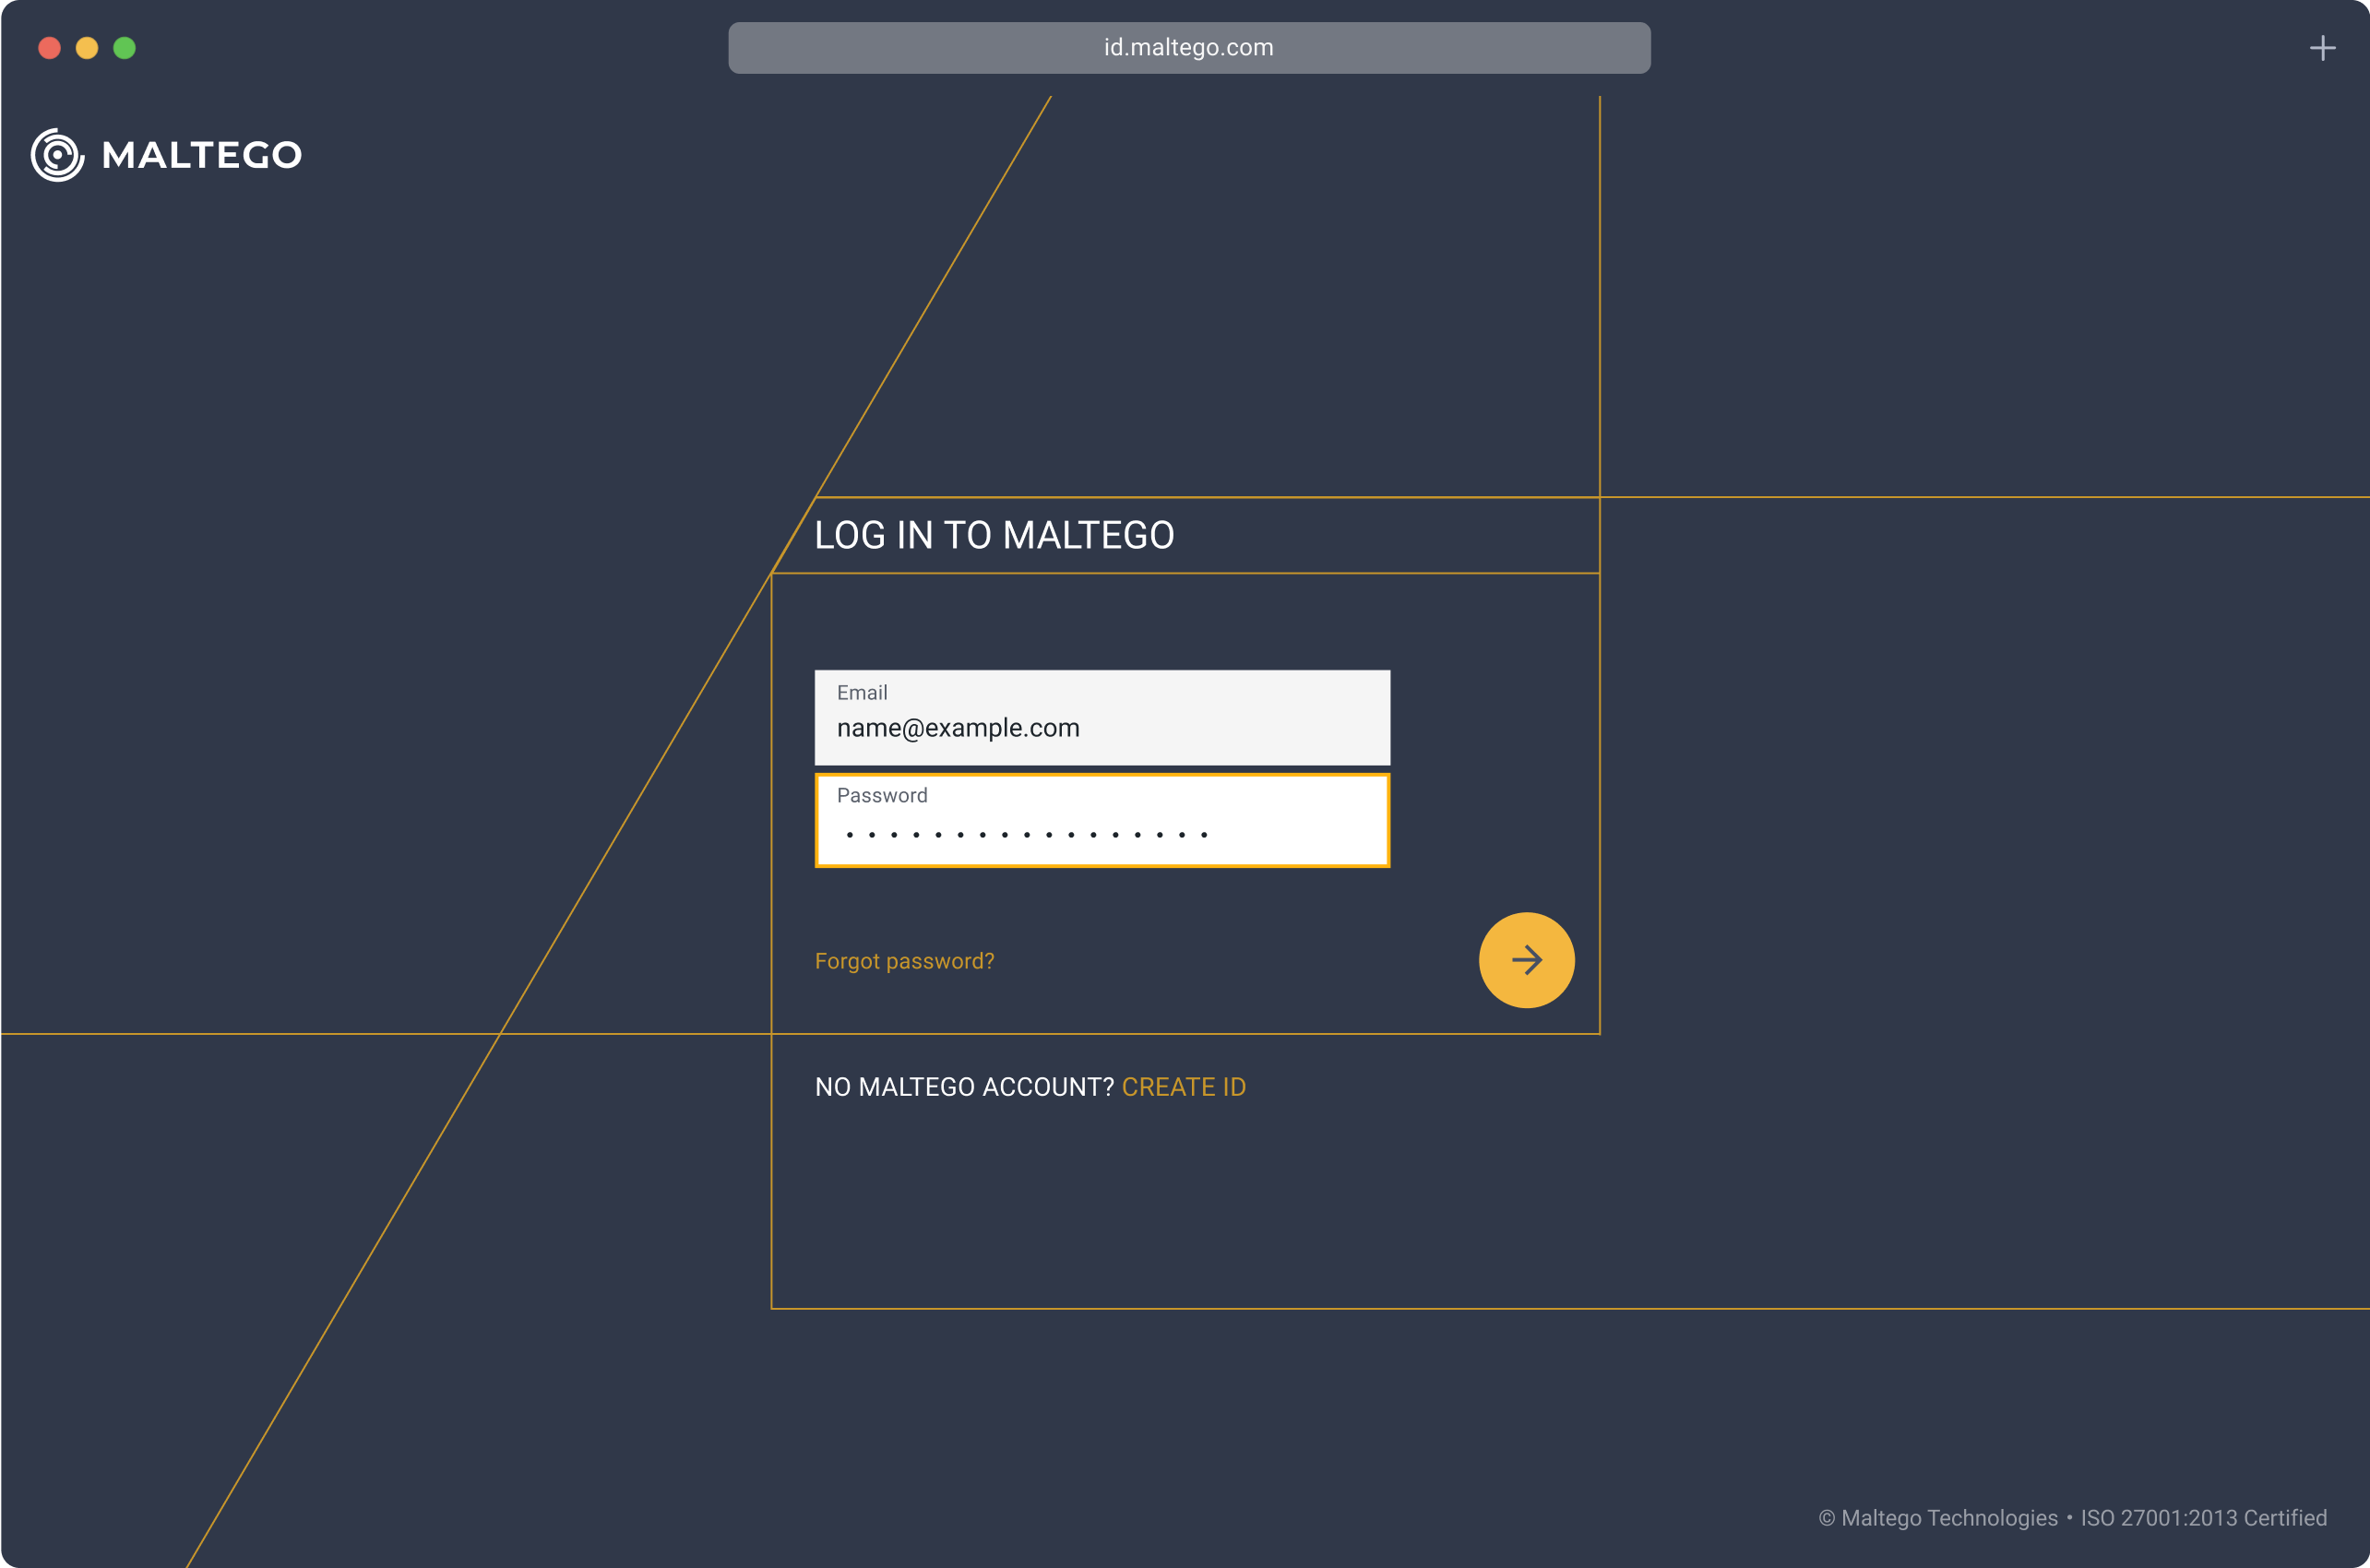
Click on “Browser Login” to open the Maltego ID login page on your default browser, or click on the “Copy” button to copy the URL and paste it in your preferred browser. On the login page, enter your Maltego ID account login credential and click on the arrow button to log in.
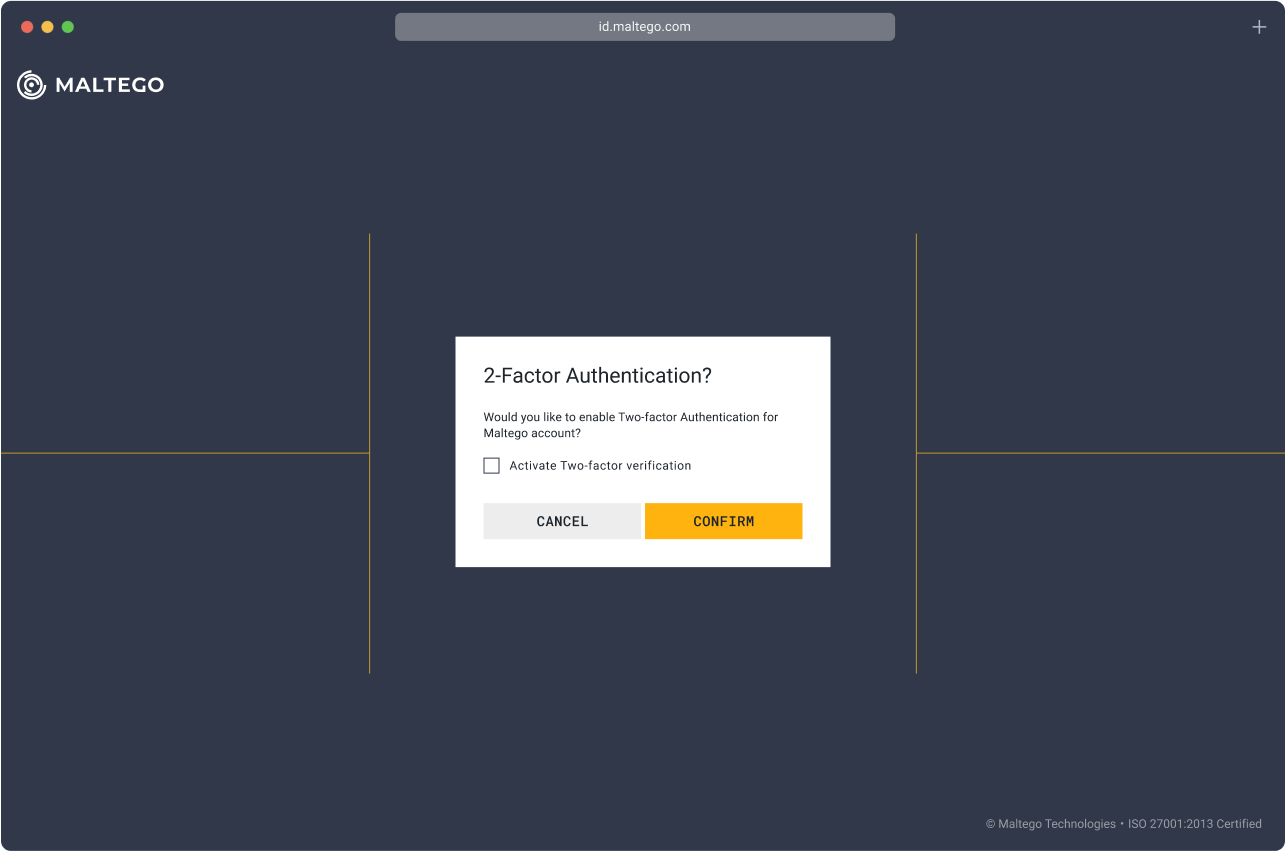
With Maltego ID, you have the option to set up two-factor authentication. If you do not wish to set up two-factor authentication for your Maltego ID account, simply click “Cancel” and your login will be completed.
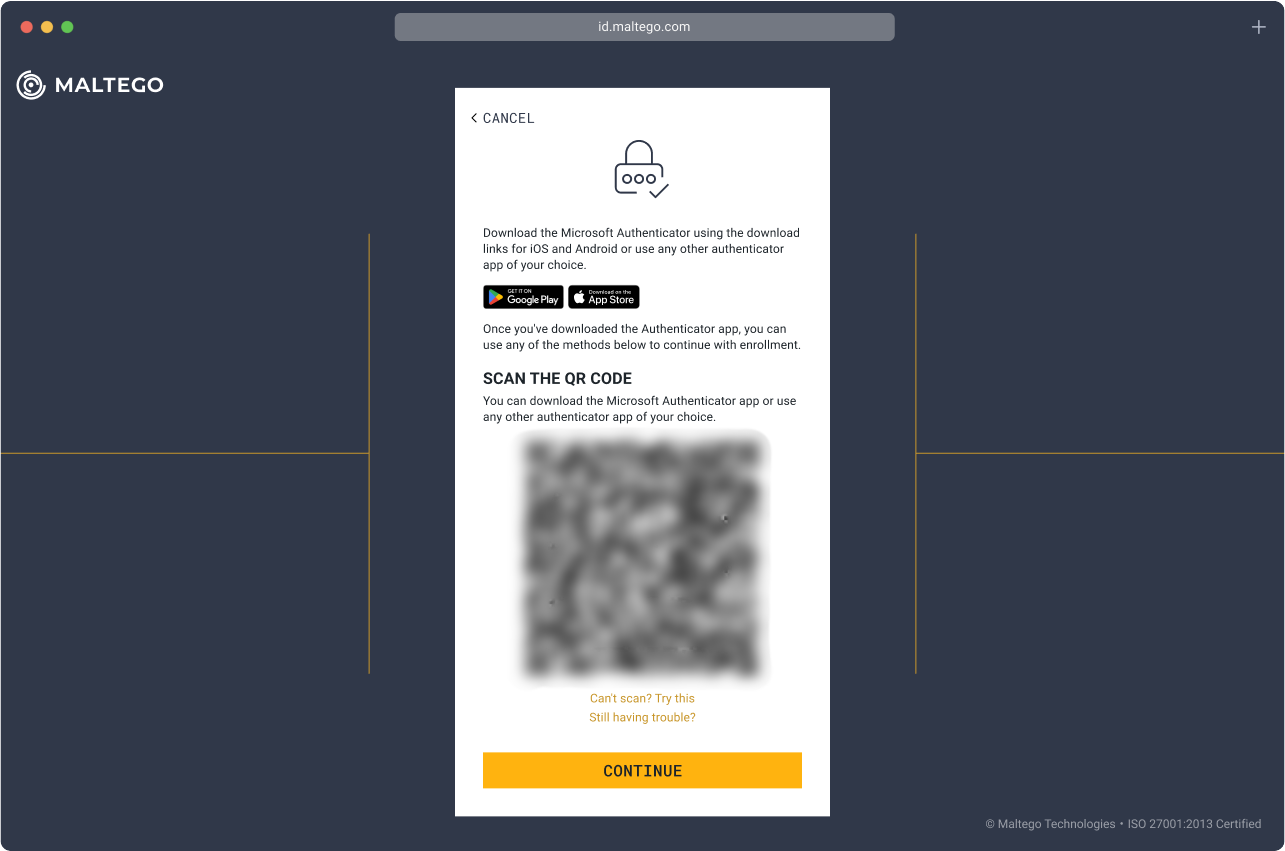
If you want to set up two-factor authentication for your Maltego ID, please check the box and click “Confirm.” You will see a QR code that you can scan using any authenticator app to set up two-factor authentication.
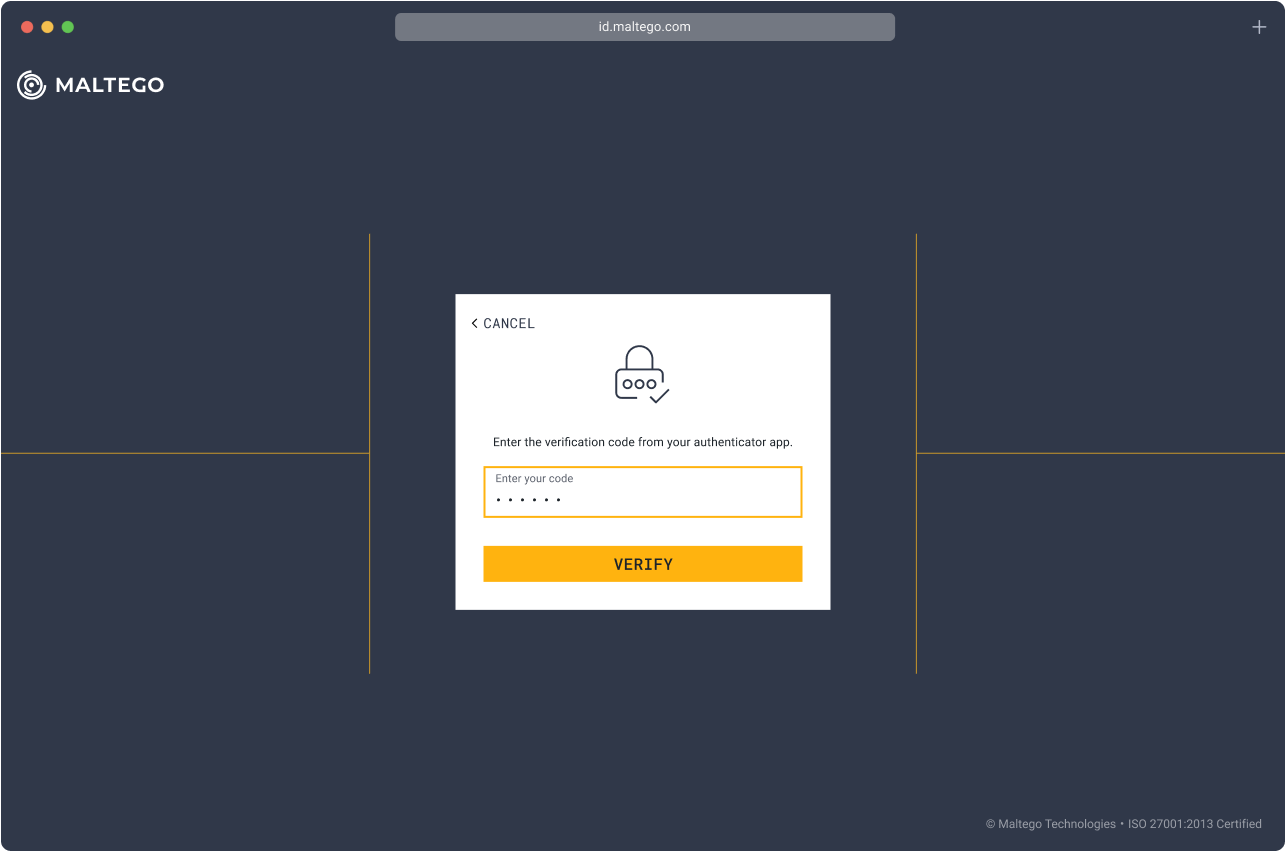
Once you scanned the QR code and set up two-factor authentication for Maltego ID in your authenticator app, enter the authentication code to complete the process.
After you complete the authentication, close the browser and return to your Maltego Desktop Client.
The Maltego Desktop Client will confirm your login and authentication. Click on the “Next” button in your Maltego Desktop Client setup wizard to finish configuring Maltego CE.
You are now ready to start using Maltego CE! Explore our documentation to get started, or read about example use cases in our Beginner’s Guide series.
If you have any questions about using Maltego CE, reach out to us anytime at support@maltego.com.
Happy investigating!


 4.5 rating


